OpenCPI Xilinx ZC706 Getting Started Guide
Document Revision History
Revision |
Description of Change |
Date |
|---|---|---|
v1.0 |
Initial Release |
3/2026 |
How to Use This Document
This document provides installation information that is specific to setting up the OpenCPI Xilinx® ZC706 embedded system for use with OpenCPI. It describes system-specific details, if any, about setting up:
The platforms that comprise the system
The system as a whole
Use this document in conjunction with the OpenCPI Installation Guide, which describes the general steps to enable OpenCPI for use on an embedded system. Use this guide as a companion to the OpenCPI Installation Guide, especially when performing the steps described in the chapter “Enabling OpenCPI Development for Embedded Systems”. It provides details about the ZC706 system that can be applied to the procedures described in that section.
The following documents can also be used as reference to the tasks described in this document:
Note that the OpenCPI Glossary is also contained in both the OpenCPI Installation Guide and the OpenCPI User Guide.
This document assumes a basic understanding of the Linux command line (or “shell”) environment.
Overview
The ZC706 is a Xilinx® Zynq®-7000 All Programmable System-on-Chip (AP SoC) evaluation board that consists of an RCC/CPU (software) “PS” platform and an HDL (FPGA) “PL” platform connected by an Advanced Extensible Interface (AXI) bus. See the product brief at https://www.xilinx.com/products/boards-and-kits/ek-z7-zc706-g.html for detailed information about the ZC706.
In OpenCPI, the embedded RCC platform is xilinx24_1_aarch32
and the HDL platform is zc706.
The zc706 HDL platform supports the following configurations when used with an
Analog Devices FMCOMMS2 or FMCOMMS3 daughtercard installed in the FMC LPC slot:
Configuration |
Description |
|---|---|
|
1 receive channel, 0 transmit channels (FMCOMMS2/3, LPC slot) |
|
0 receive channels, 1 transmit channel (FMCOMMS2/3, LPC slot) |
|
1 receive channel, 1 transmit channel (FMCOMMS2/3, LPC slot) |
Installation Prerequisites
The following items are required for OpenCPI ZC706 system installation and setup:
Xilinx ZC706 evaluation board
12V power supply
mini B USB to USB-A cable
SD card: use the one that comes with the product kit or provide a different one (OpenCPI ZC706 setup has been tested using a 16GB microSD card)
These items are typically provided with the ZC706 product kit.
An SD card reader is also required.
Note
Ignore any quick start cards or instructions that come with the product kit. This getting started guide and the OpenCPI Installation Guide provide the necessary instructions for setting up the ZC706 for OpenCPI.
The following items are optional:
1-Gigabit Ethernet cable
Analog Devices FMCOMMS2 or FMCOMMS3 daughtercard
Installation Steps for Platforms
This section contains details about the ZC706 that pertain to the instructions for installing OpenCPI platforms in the section “Installation Steps for Platforms” in the OpenCPI Installation Guide.
Required Downloads for Installing the Platform
The zc706 system requires the Xilinx Binary Zynq Release 2024.1. Download the OpenCPI Xilinx OSP for the zc706 using the following link:
This package is to be placed in the /tools/Xilinx/ZynqReleases/2024.1/ (or /opt/Xilinx/ZynqReleases/2024.1/) directory.
Download the OpenCPI Xilinx RCC Platform Kernel Headers using the following link:
Place the 2024.1 32-bit Kernel Headers package in /tools/Xilinx/ZynqHeaders/2024.1/ (or /opt/Xilinx/ZynqHeaders/2024.1/).
Details for Installing the RCC Platform
The ZC706 system supports the RCC platform xilinx24_1_aarch32, which
can also be used by other Zynq-7000 systems.
If this platform has already been installed and built for another system,
it can apply to the ZC706 and does not need to be installed and built again.
Details for Installing the HDL Platform
As described in the OpenCPI Installation Guide, each OpenCPI platform
depends on a set of third-party/vendor tools that need to be manually
installed so that the platform can be built. The zc706 HDL platform
(HDL target zynq) is built with the Xilinx Vivado tools.
Setting up the ZC706 After its Platforms are Installed
This section describes steps to enable the OpenCPI development and execution environment that must be performed on the ZC706 after its platforms have been installed. It also contains setup information specific to the ZC706 system that is needed when performing the tasks described in the section “Installation Steps for Systems After their Platforms are Installed” in the OpenCPI Installation Guide.
Details for Establishing a Serial Console Connection
This section contains details about the ZC706 that pertain to the instructions for setting up a serial I/O console described in the section “Establishing a Serial Console Connection” in the OpenCPI Installation Guide:
On ZC706 systems, the micro-USB serial port labeled USB UART can be used to access the serial console connection with the processor, as shown in Figure 3:. Use a micro-USB to USB-A cable to connect this port to the development host.
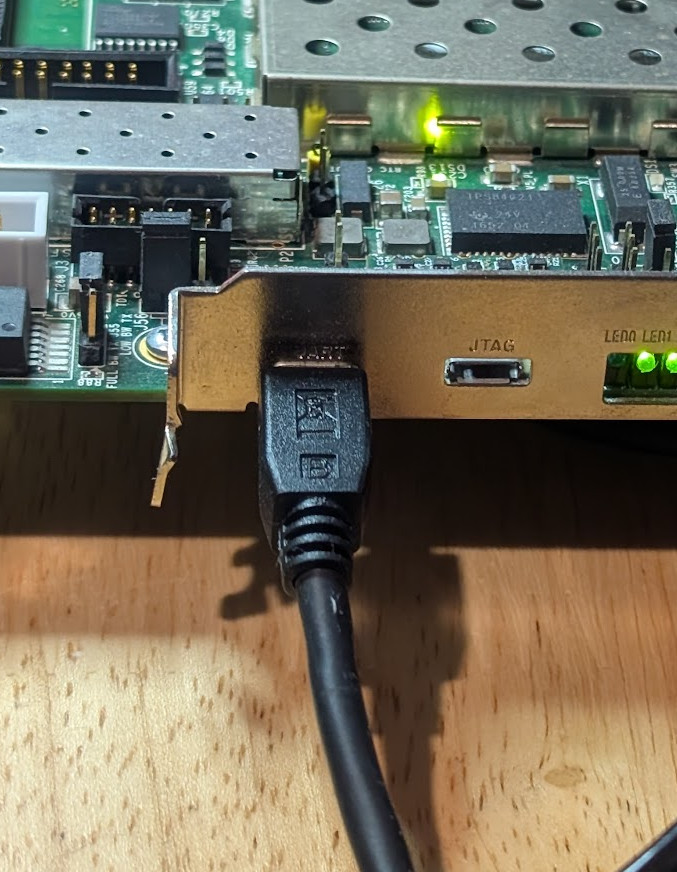
Figure 3: ZC706 USB UART Port
The console serial port operates at 115200 baud.
Details for Configuring the Runtime Environment on the Embedded System
This section contains details about the ZC706 that pertain to the instructions for configuring the runtime environment on the embedded system described in the section “Configuring the Runtime Environment on the Embedded System” in the OpenCPI Installation Guide.
Connecting the ZC706 to a DHCP-supported Network (Optional)
Using server mode or network mode for OpenCPI on the ZC706 embedded system requires establishing an Ethernet connection from the ZC706 to a network that supports DHCP.
There is one Gigabit Ethernet port located on the ZC706. Use a 1-Gigabit Ethernet cable to connect this port to the DHCP-supported network, as shown in Figure 4:.
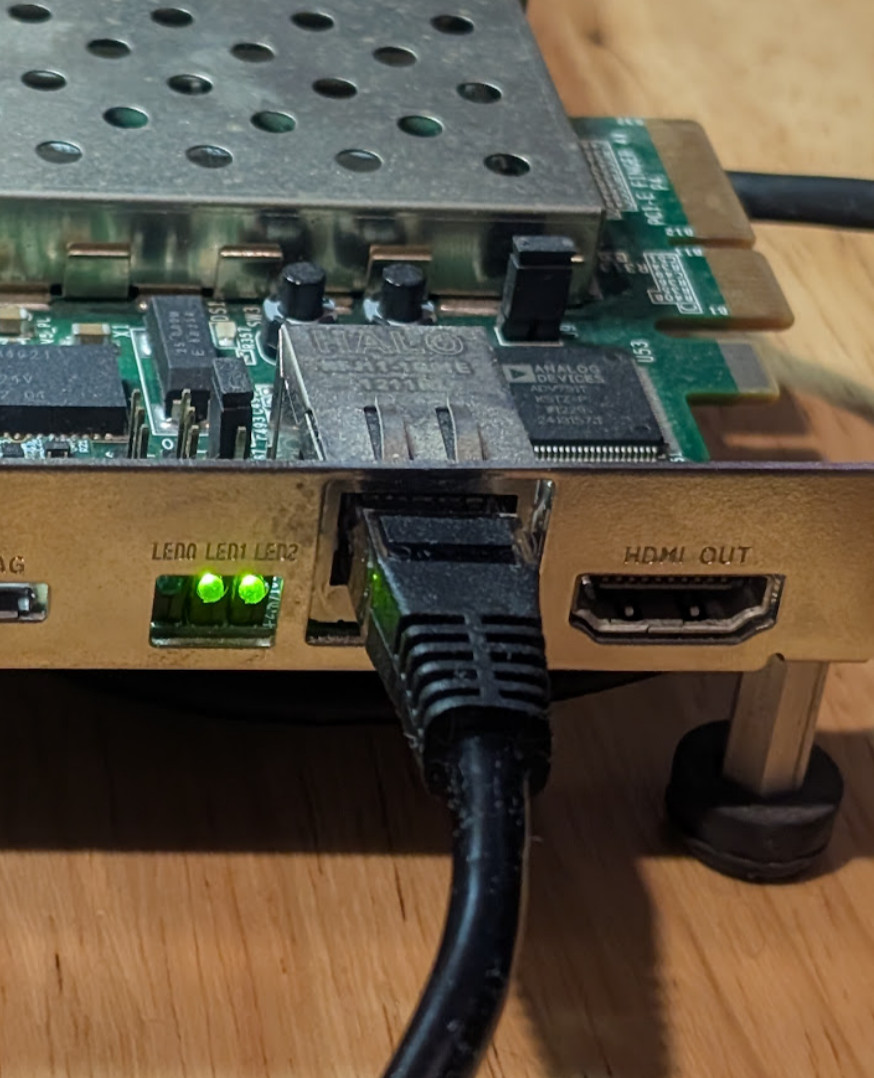
Figure 4: ZC706 Connected Ethernet
Note
Deploying multiple ZC706 boards on an Ethernet network requires each board to have a unique MAC address. See the OpenCPI Installation Guide for details.
Connecting an FMC Daughtercard (Optional)
The ZC706 has one FPGA Mezzanine Card (FMC) Low Pin Count (LPC) slot and one FMC High Pin Count (HPC). OpenCPI currently supports the following daughtercards that can be installed in this slot:
Install the daughtercard into the FMC LPC slot before applying power to the ZC706, as shown in Figure 5:.
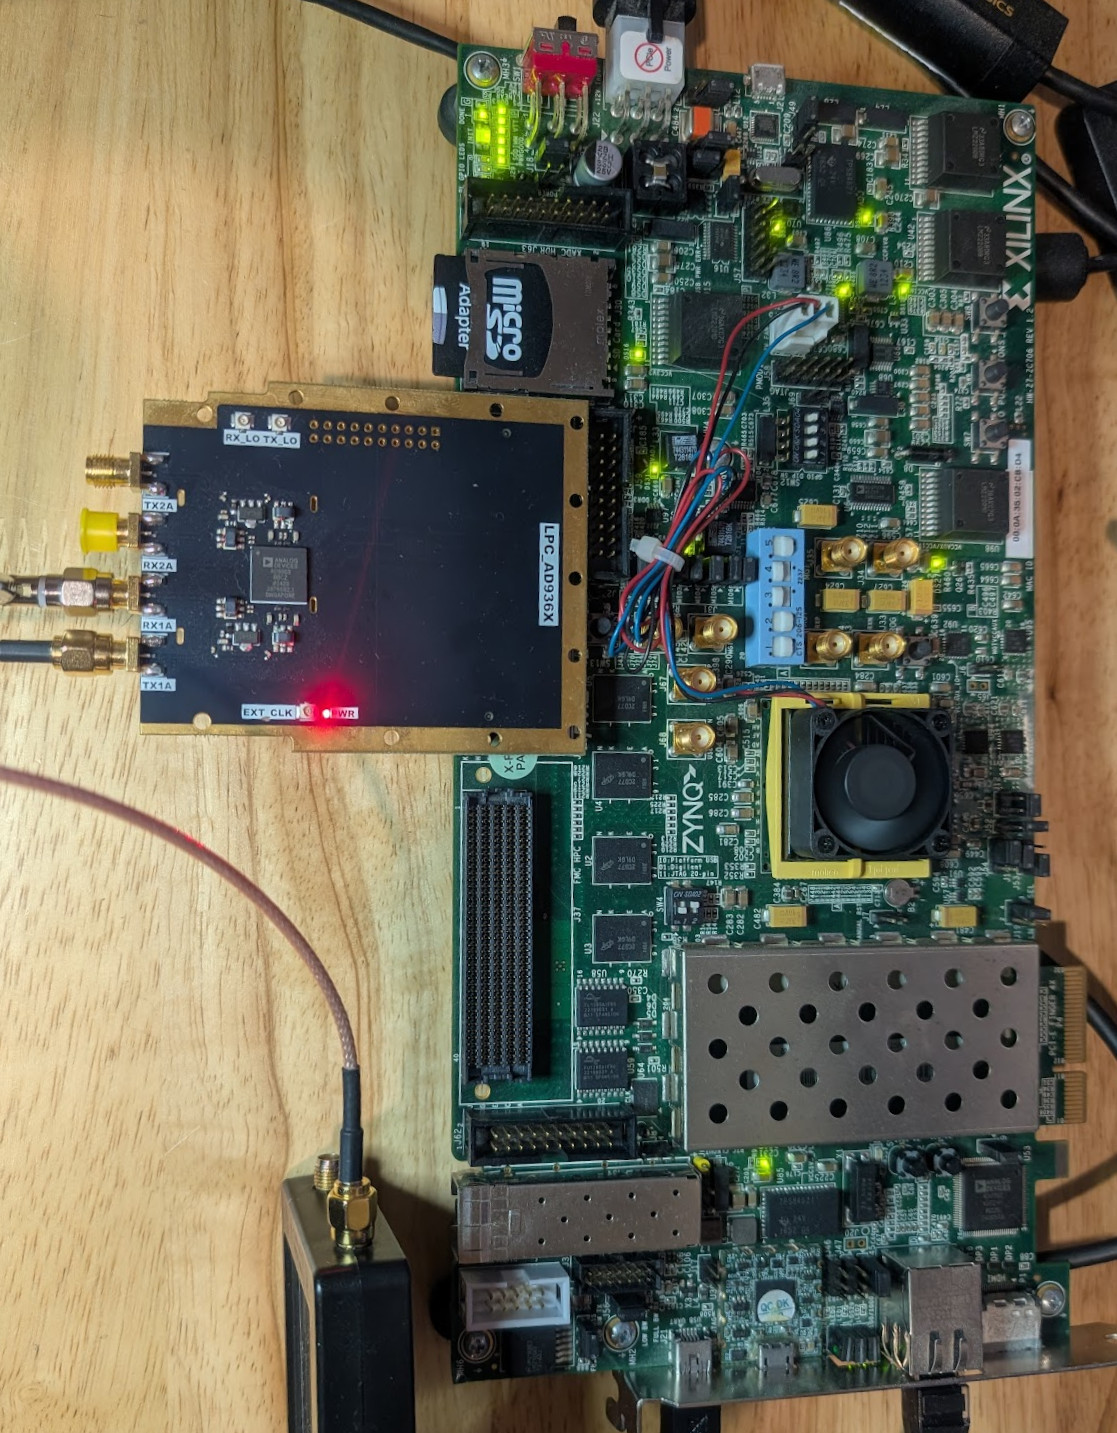
Figure 5: ZC706 FMC LPC Slot with Installed Daughtercard
Booting the ZC706 from the SD Card
The ZC706 needs to be configured to boot from the SD card. To configure the board and then boot from the SD card:
Remove power from the ZC706.
Set the following switches on SW11 to boot from the SD card, as shown in Figure 6::
Set SW11[1] to the LOW position.
Set SW11[2] to the LOW position.
Set SW11[3] to the HIGH position.
Set SW11[4] to the HIGH position.
Set SW11[5] to the LOW position.
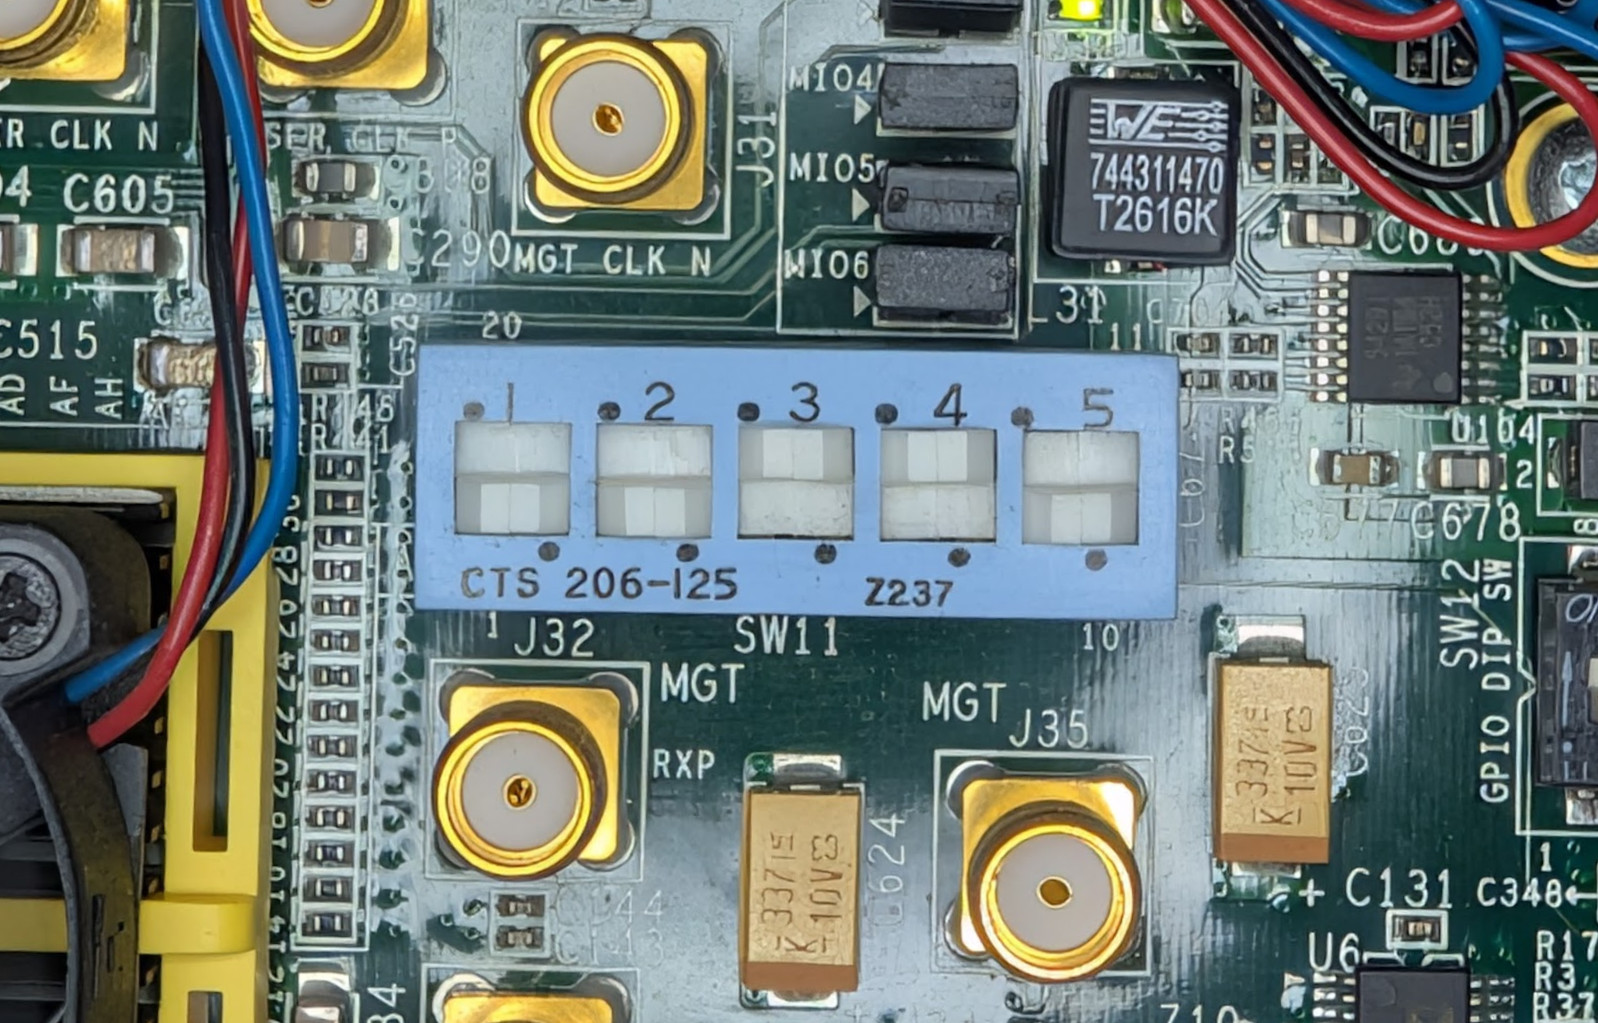
Figure 6: ZC706 Top View with SW11 SD Card Boot Mode Switch Settings
Insert the SD card into the SD card slot on the ZC706, as shown in Figure 7:.
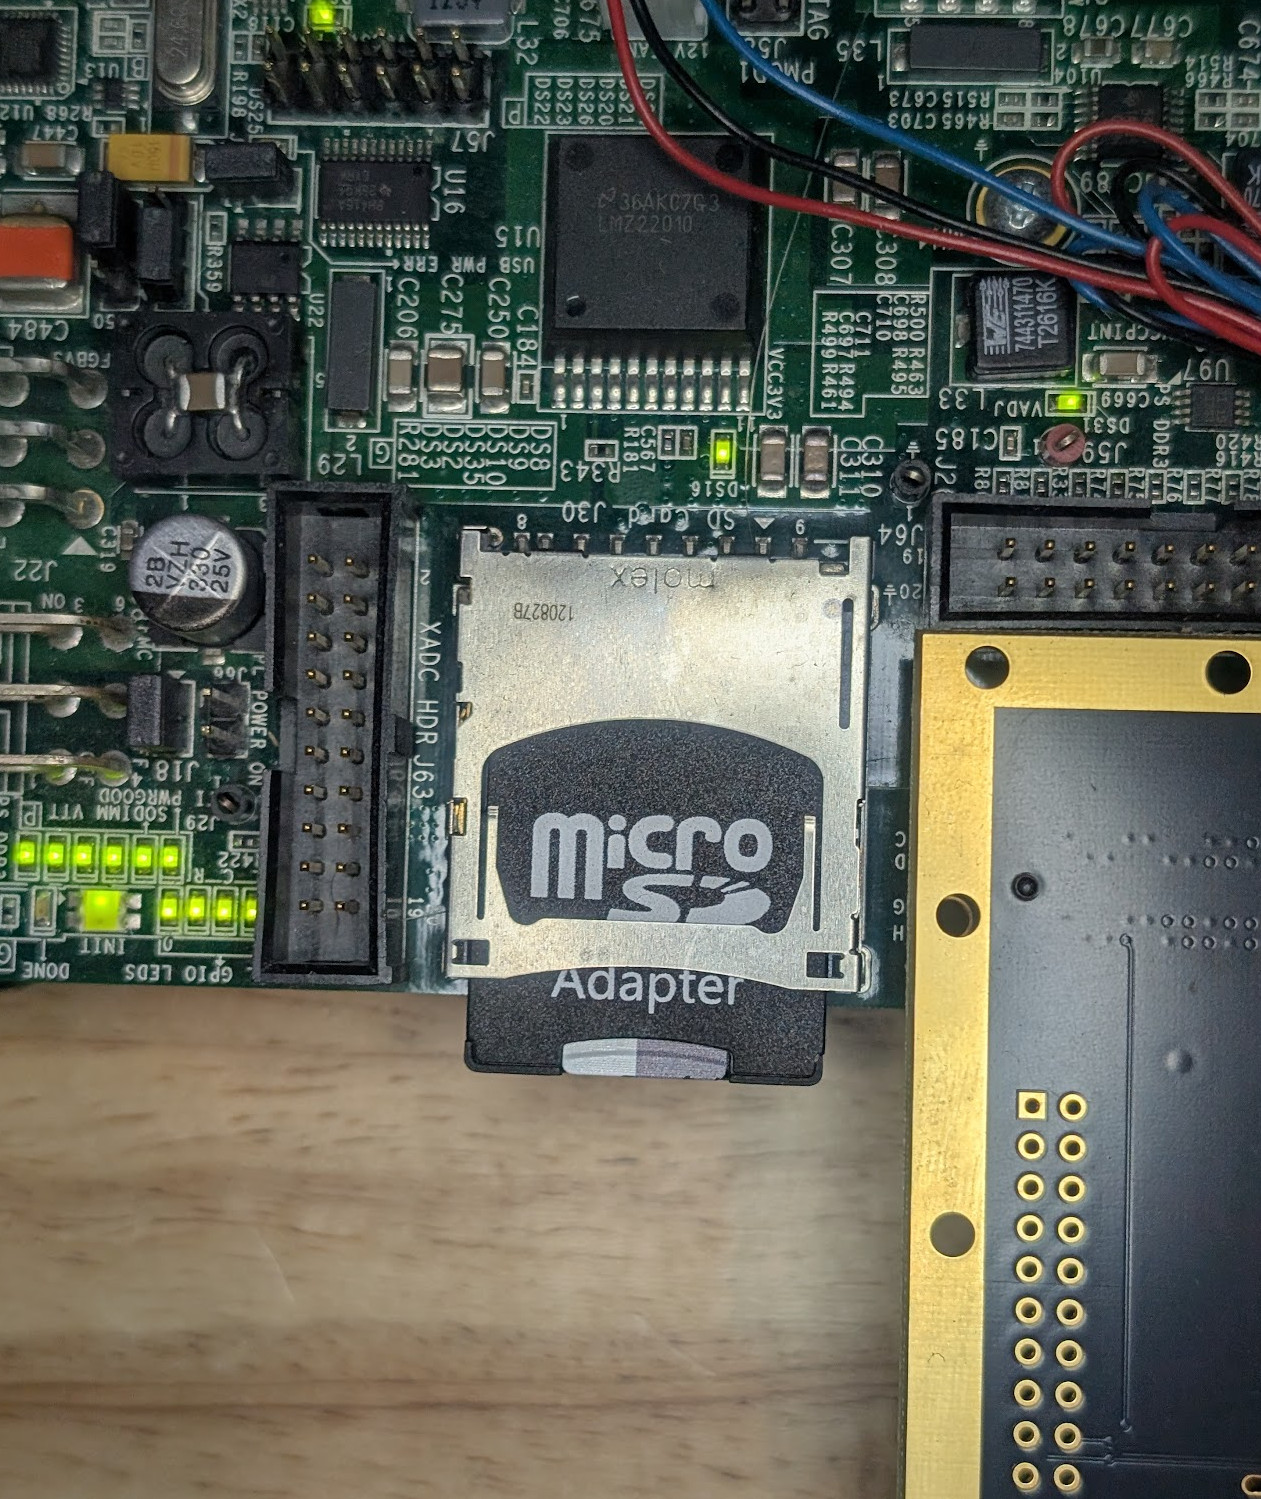
Figure 7: ZC706 SD Card Slot
Connect a terminal to the micro-USB connector on the ZC706 labeled USB UART. The baud rate should be 115200.
On the development host, start the terminal emulator (usually with the
screencommand) at 115200 baud.Apply power to the ZC706 with the terminal still connected.
After a successful boot to PetaLinux, log in to the system using root for user name and password,
as shown in Figure 8:.
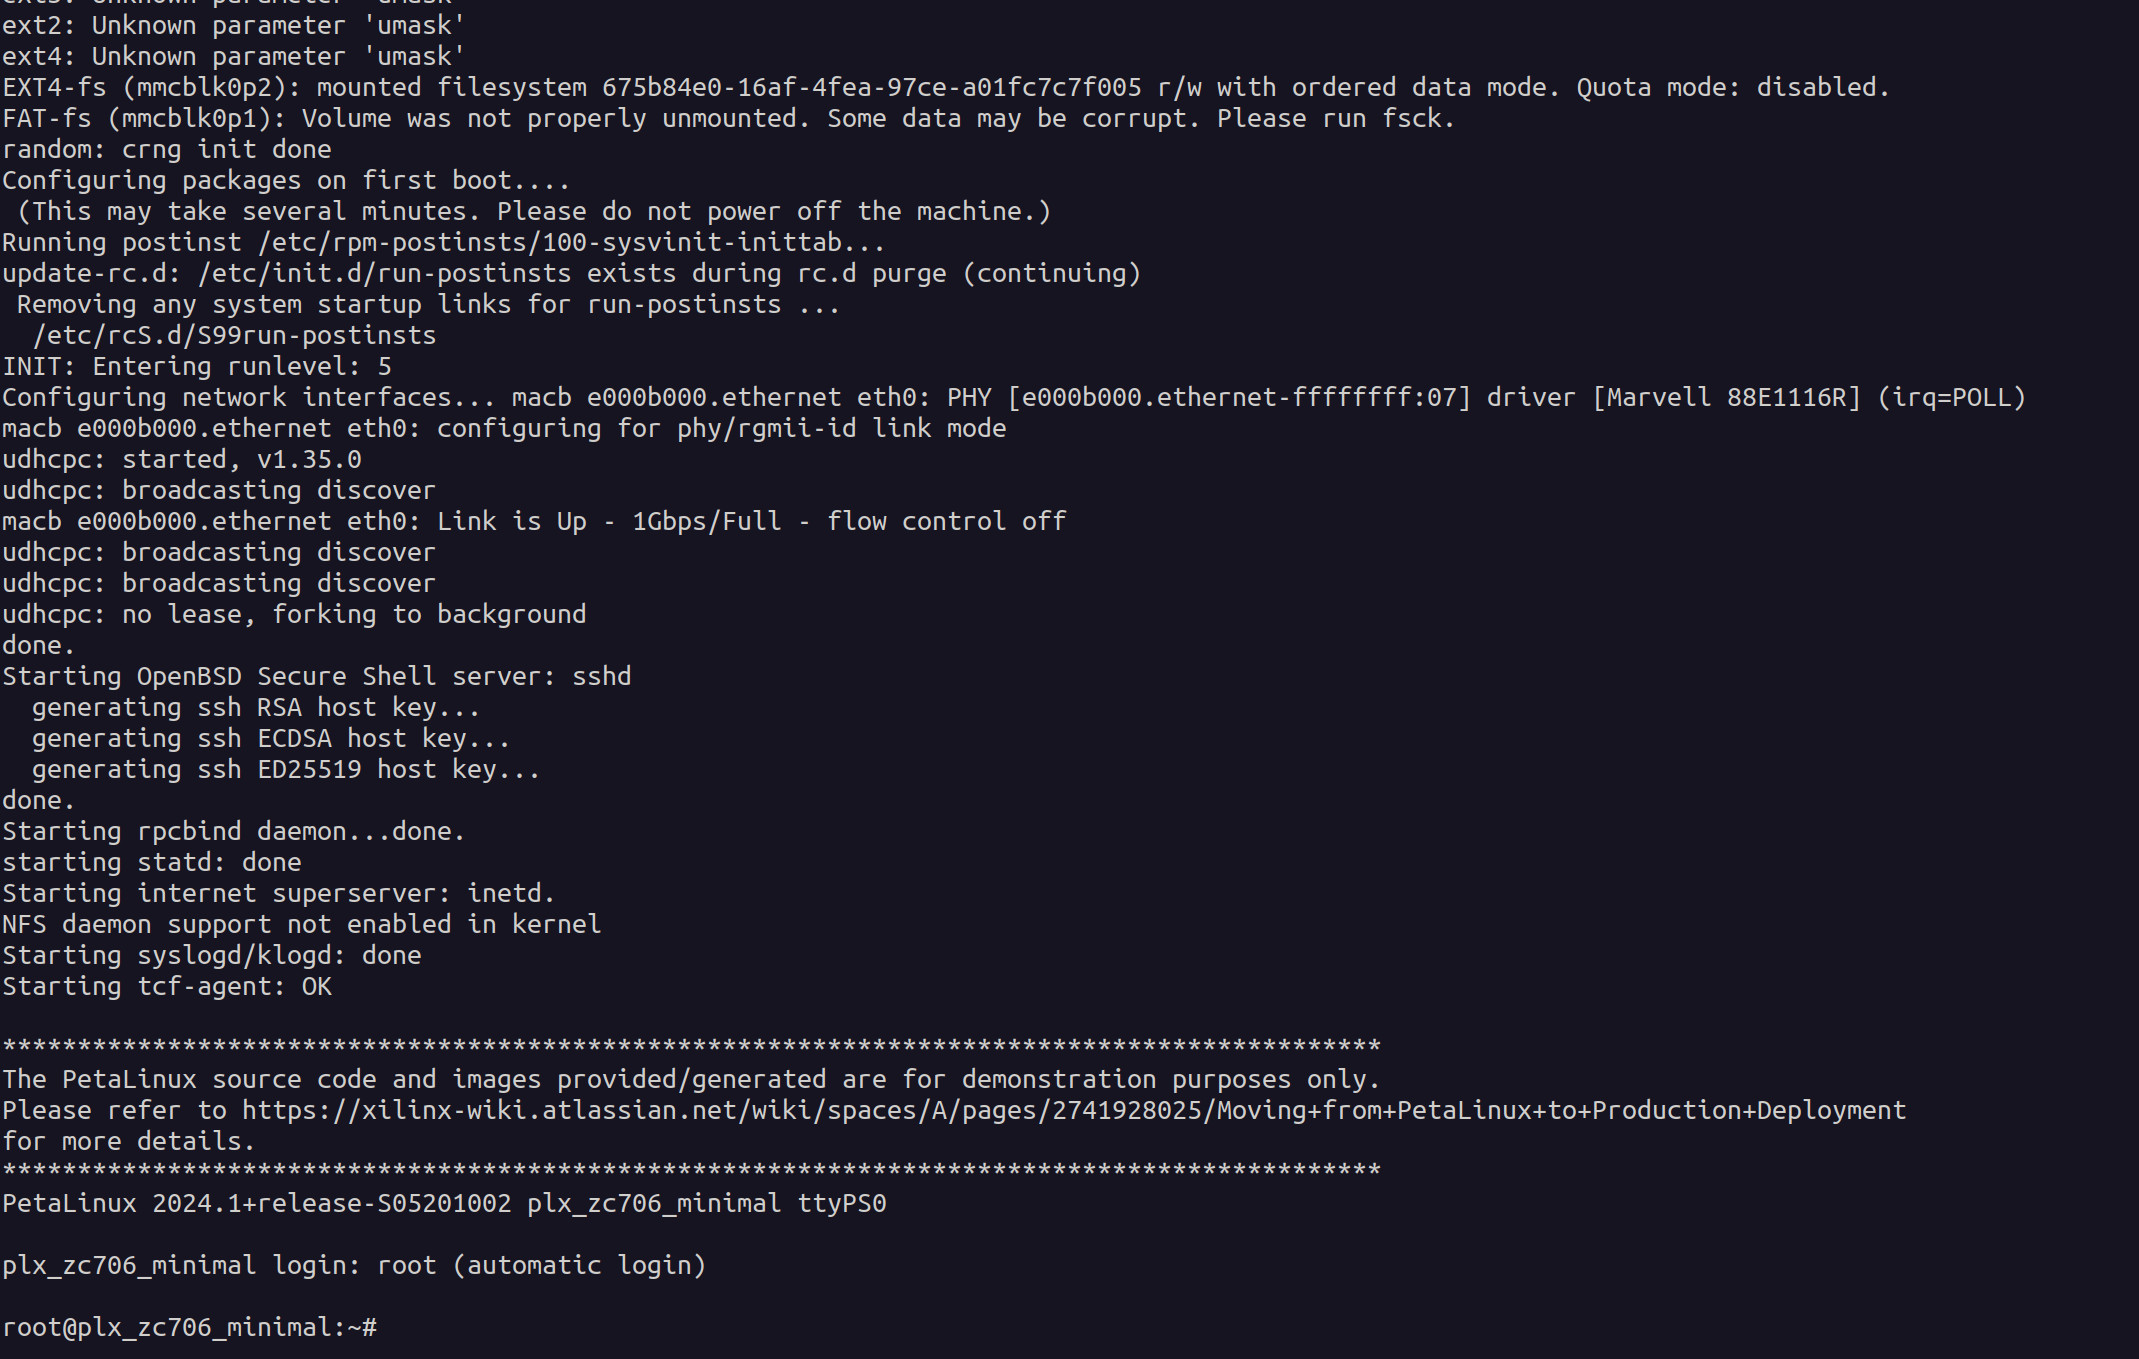
Figure 8: ZC706 Successful Boot to PetaLinux
Enabling the Network Interface (Optional)
When a single ZC706 is on the network, execute the following command to enable its Ethernet interface:
$ ifconfig eth0 <desired ip address>
When multiple ZC706 boards are on the network, you must modify the mynetsetup.sh script according to the instructions in the section “Connecting HDL Platforms to an Ethernet Network” in the OpenCPI Installation Guide before you proceed to running the test application.